Showing posts with label HTML. Show all posts

The Most Simple HTML Website ever.

Hi guys,
           For the past few days, I was busy working on a Template for website. Actually it does not need even few days to build it, It is that simple. I'm posting some screenshots of it below. If anyone would like to buy it, Contact me on jovelonline@gmail.com or comment below. I created this website as an experiment. I'm planning to start a website to sell such Templates. So, if anyone buys this Template, then I can conclude that this is the right time to start my Venture. And also, Please suggest a good name for my Venture. There's no much programing in it. I take only the designing side. You can manually add the content into this.(I can help with adding logo)

This is made with Adobe Muse. It uses HTML, CSS and Javascript. Its Responsive, it got Dynamic Page resizing, a Better Sitemap and rest, see for yourself.


Continue Reading

Lazy Load Feature for Blogger

Lazy load function is used to increase the speed of your website by preventing images from loading that are out of the main view. Increasing your speed will in turn increase your audience. try it. it works. 

Copy the code below, then go to layout tab in Blogger and add a gadget. Select HTML/Javascript and paste the code in it. Leave the Title empty. now here's the code. 

<script type='text/javascript'>//<![CDATA[
(function(a){a.fn.lazyload=function(b){var c={threshold:0,failurelimit:0,event:"scroll",effect:"show",container:window};if(b){a.extend(c,b)}var d=this;if("scroll"==c.event){a(c.container).bind("scroll",function(b){var e=0;d.each(function(){if(a.abovethetop(this,c)||a.leftofbegin(this,c)){}else if(!a.belowthefold(this,c)&&!a.rightoffold(this,c)){a(this).trigger("appear")}else{if(e++>c.failurelimit){return false}}});var f=a.grep(d,function(a){return!a.loaded});d=a(f)})}this.each(function(){var b=this;if(undefined==a(b).attr("original")){a(b).attr("original",a(b).attr("src"))}if("scroll"!=c.event||undefined==a(b).attr("src")||c.placeholder==a(b).attr("src")||a.abovethetop(b,c)||a.leftofbegin(b,c)||a.belowthefold(b,c)||a.rightoffold(b,c)){if(c.placeholder){a(b).attr("src",c.placeholder)}else{a(b).removeAttr("src")}b.loaded=false}else{b.loaded=true}a(b).one("appear",function(){if(!this.loaded){a("<img />").bind("load",function(){a(b).hide().attr("src",a(b).attr("original"))[c.effect](c.effectspeed);b.loaded=true}).attr("src",a(b).attr("original"))}});if("scroll"!=c.event){a(b).bind(c.event,function(c){if(!b.loaded){a(b).trigger("appear")}})}});a(c.container).trigger(c.event);return this};a.belowthefold=function(b,c){if(c.container===undefined||c.container===window){var d=a(window).height()+a(window).scrollTop()}else{var d=a(c.container).offset().top+a(c.container).height()}return d<=a(b).offset().top-c.threshold};a.rightoffold=function(b,c){if(c.container===undefined||c.container===window){var d=a(window).width()+a(window).scrollLeft()}else{var d=a(c.container).offset().left+a(c.container).width()}return d<=a(b).offset().left-c.threshold};a.abovethetop=function(b,c){if(c.container===undefined||c.container===window){var d=a(window).scrollTop()}else{var d=a(c.container).offset().top}return d>=a(b).offset().top+c.threshold+a(b).height()};a.leftofbegin=function(b,c){if(c.container===undefined||c.container===window){var d=a(window).scrollLeft()}else{var d=a(c.container).offset().left}return d>=a(b).offset().left+c.threshold+a(b).width()};a.extend(a.expr[":"],{"below-the-fold":"$.belowthefold(a, {threshold : 0, container: window})","above-the-fold":"!$.belowthefold(a, {threshold : 0, container: window})","right-of-fold":"$.rightoffold(a, {threshold : 0, container: window})","left-of-fold":"!$.rightoffold(a, {threshold : 0, container: window})"})})(jQuery);$(function(){$("img").lazyload({placeholder:"http://i22.servimg.com/u/f22/15/42/72/40/grey10.gif",effect:"fadeIn",threshold:"-50"})})//]]></script>
Continue Reading

Mint Green Share Box for websites

You might have seen our older versions of sharer boxes, this is the latest of''em. here's the code. 
if your using blogger, go to layouts, then add a gadget select HTML/Javascript then paste this code. leave the Title column empty. The demo, is this blog itself.

<style>
#joelblogsharer{
position:fixed;
left:0px;
bottom:0;
background-color:#b8ff79;
border:none;
opacity:0.7;
width:auto;
height:auto;
padding:5px 10px;
box-shadow: 5px 5px 15px #888888;
}
#joelblogsharer:hover{
opacity:1;
}
</style>

<div align="center" id="joelblogsharer" title="joe-amis.blogspot.com">
<!-- Facebook -->
<div id="fb-root"></div>
<script>(function(d, s, id) {
  var js, fjs = d.getElementsByTagName(s)[0];
  if (d.getElementById(id)) return;
  js = d.createElement(s); js.id = id;
  js.src = "//connect.facebook.net/en_GB/sdk.js#xfbml=1&version=v2.8";
  fjs.parentNode.insertBefore(js, fjs);
}(document, 'script', 'facebook-jssdk'));</script>
<div class="fb-share-button" data-layout="button" data-size="small" data-mobile-iframe="true"><a class="fb-xfbml-parse-ignore" target="_blank" href="https://www.facebook.com/sharer/sharer.php?u&amp;src=sdkpreparse">Share</a></div><br /><br />
<!-- Twitter -->
<a href="https://twitter.com/share" class="twitter-share-button" data-count="vertical">Tweet</a>
<script>!function(d,s,id){var js,fjs=d.getElementsByTagName(s)[0],p=/^http:/.test(d.location)?'http':'https';if(!d.getElementById(id)){js=d.createElement(s);js.id=id;js.src=p+'://platform.twitter.com/widgets.js';fjs.parentNode.insertBefore(js,fjs);}}(document, 'script', 'twitter-wjs');</script><br />
<!-- Google+ -->
<div align="center" class="g-plusone" data-size="tall"></div>
<script type="text/javascript">
  (function() {
    var po = document.createElement('script'); po.type = 'text/javascript'; po.async = true;
    po.src = 'https://apis.google.com/js/plusone.js';
    var s = document.getElementsByTagName('script')[0]; s.parentNode.insertBefore(po, s);
  })();
</script><br />
<!-- LinkedIN -->
<script src="//platform.linkedin.com/in.js" type="text/javascript">
 lang: en_US
</script>
<script type="IN/Share" data-counter="top"></script><br />
</div>

Continue Reading

Go Back Function using JavaScript

"Go Back" function using Javascript. In this post, you'll see how to add a "Go Back" button to a webpage.


The code for the button:

<input type="button" value="Go Back one page" onclick="history.back(-1)" />
enjoy.
Continue Reading

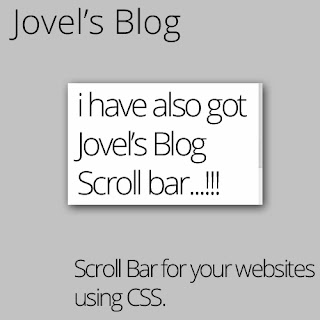
Jovel's Blog Scroll bar using CSS.

Seeing your old scroll bar bores you ? No More Boring... here's a good looking scroll bar for websites and Blogs, Created with CSS.


Best Viewed in Google Chrome.

Here's the CSS code.

::-webkit-scrollbar{ width: 8px; } ::-webkit-scrollbar-track{ -webkit-box-shadow: inset 0 0 6px rgba(0,0,0,0.3); -ms-box-shadow: inset 0 0 6px rgba(0,0,0,0.3); border-radius: 0px; } ::-webkit-scrollbar-thumb{ border-radius: 0px; -webkit-box-shadow: inset 0 0 6px rgba(0,0,0,0.5); -ms-box-shadow: inset 0 0 6px rgba(0,0,0,0.5); }

for Blogger users,
Select your blog and go to Template -> Customize., Click the Advanced tab and select Add CSS then paste this code.

For Websites,
Paste this code before </style> Tag.

Enjoy your new look of Scroll bar.
Continue Reading

Jovel's Blog's Sharer Box, New and updated.

We've recently created a sharing box for blogs and websites. this one is updated of that. Better, Less Codes, Designed by Jovel's Blog, Plugins by Addthis. See the demo at Jovel's Blog Demos


What he Got.

Facebook Like Button

Twitter Tweet Button

Google +1 button. And even more.....

How to Add this (in Blogs).

Select your Blog-> Layout -> Add Gadget -> HTML/Javascript. now paste this code in it and click Save.
<style>
#jovelsshare{
height:auto;
width:auto;
background-color:#fffdde;
border-spacing:inherit;
left:40px;
top:15%;
padding:5px;
border:solid 5px;
border-color:#d5d5d5;
opacity:0.6;
position:fixed;
}
#jovelsshare:hover{
opacity:1;
}
</style>
<div id="jovelsshare" title="Jovel's Blog Share">
<a class="addthis_button_facebook_like" fb:like:layout="box_count"></a><br />
<a class="addthis_button_tweet" tw:count="vertical"></a><br />
<a class="addthis_button_google_plusone" g:plusone:size="tall"></a><br/>
<a class="addthis_counter"></a><br />
<a align="center" href="http://joe-amis.blogspot.com/2013/10/jovels-blogs-sharer-box-new-and-updated.html">Get This</a>
</div> <script type="text/javascript">var addthis_config = {"data_track_addressbar":true};</script>

<script type="text/javascript" src="//s7.addthis.com/js/300/addthis_widget.js#pubid=ra-5263902d4534c996"></script>
Continue Reading

How to create a custom 404 page for blogs.

In this tutorial, I'm gonna show you how to create a custom 404 page for you blogs. See our 404 page here
Step 1: Go to the blogger you want to change the 404 page>Settings>Search Preferences.

Step 2: Under 'Errors and Redirections', Near 'Custom Page Not Found', Click edit.

Step 3:Copy and paste this code there.

<style>
.joediv #main {
width: 100%;
text-align: center;
margin: 3em 0 10em 0;
color: #999;
}
</style>
<div class="joediv">
    <style>
@import url(http://fonts.googleapis.com/css?family=Frijole);
      h1 {
        font-family: 'Frijole', cursive;
        font-size: 25px;
      }
    </style>
<h1>Its 404.., Go Back, There's nothing here.... :'( visit our<a href="http://joe-amis.blogspot.com">Homepage</a></h1></div>
Step 4:Replace the Orange colored text with your homepage. Click Save Changes.

Enjoy your new 404.
Continue Reading

Adding a Floating Sharer box to Blogger

I've created a new sharing widget for blogger. Consis of LinkedIN, Twitter, Facebook, Google+ Recommend Buttons, Hope you like. See the live demo at http://test10189.blogspot.in/


How to Add it to your Website.

Step 1: Go to blogger->YOUR BLOG->Layout-> Add a Gadget->HTML/Javascript.

Step 2: Place this Code in it. (My Own Code)


<style>
#joelblogsharer{
position:fixed;
left:40px;
top:15%;
background-color:#999999;
border:groove;
opacity:0.5;
border-spacing:inherit;
border-width:medium;
font-family: 'Open Sans', sans-serif;
width:auto;
height:auto;
border-radius:10px;
padding:5px 10px;
}
#joelblogsharer:hover{
opacity:1;
}
</style>

<div align="center" id="joelblogsharer" title="Like and Share this to your friends">
<!-- LinkedIN -->
<script src="//platform.linkedin.com/in.js" type="text/javascript">
 lang: en_US
</script>
<script type="IN/Share" data-counter="top"></script><br />
<!-- Twitter -->
<a href="https://twitter.com/share" class="twitter-share-button" data-count="vertical">Tweet</a>
<script>!function(d,s,id){var js,fjs=d.getElementsByTagName(s)[0],p=/^http:/.test(d.location)?'http':'https';if(!d.getElementById(id)){js=d.createElement(s);js.id=id;js.src=p+'://platform.twitter.com/widgets.js';fjs.parentNode.insertBefore(js,fjs);}}(document, 'script', 'twitter-wjs');</script><br />
<!-- Facebook -->
<div align="center" id="fb-root">
<script>(function(d, s, id) {
  var js, fjs = d.getElementsByTagName(s)[0];
  if (d.getElementById(id)) return;
  js = d.createElement(s); js.id = id;
  js.src = "//connect.facebook.net/en_US/all.js#xfbml=1&appId=139408079570627";
  fjs.parentNode.insertBefore(js, fjs);
}(document, 'script', 'facebook-jssdk'));</script>
<div align="center" class="fb-like" data-width="450" data-layout="box_count" data-show-faces="true" data-send="false"></div><br />
<!-- Google+ -->
<div align="center" class="g-plusone" data-size="tall"></div>
<script type="text/javascript">
  (function() {
    var po = document.createElement('script'); po.type = 'text/javascript'; po.async = true;
    po.src = 'https://apis.google.com/js/plusone.js';
    var s = document.getElementsByTagName('script')[0]; s.parentNode.insertBefore(po, s);
  })();
</script><br />
<img align="center" src="https://blogger.googleusercontent.com/img/b/R29vZ2xl/AVvXsEjdWgvbcdCCvk2ixC7WL_SDmT90Qcv-aGazppQNCc1WsCt1gZ583adR7SzDWrnDY6JehyphenhyphensfWKD_L9bcNtPD7VVFTOT0DwmI0H-NMkwh65a-MX70x6YKpGHUpnn_uFg7mL8blVBpNi7DBTZb/s1600/logo+copy.png" Title="SharerChoices" width="70" height="30" />

</div></div>
Never change anything in this code., it may cause errors.

Enjoy.
Continue Reading

Creating Contact form in a page.

Blogger introduced a contact form for blog. This can be added as a widget. In this tutorial i'm gonna show how to add this as a Page of blog.


Step 1 : Go to blogger and select the the blog you want to add the contact form, From the left tabs select pages tab and select blank page from new page.

Step 2 : Click the 'Edit HTML' Tab.

Step 3 : Add this code in it .

<div class="contact-form-widget">
<div class="form">
<form name="contact-form">
Name
<br />
<input class="contact-form-name" id="ContactForm1_contact-form-name" name="name" size="30" type="text" value="" />
Email
<span style="font-weight: bolder;">*</span>
<br />
<input class="contact-form-email" id="ContactForm1_contact-form-email" name="email" size="30" type="text" value="" />
Message
<span style="font-weight: bolder;">*</span>
<br />
<textarea class="contact-form-email-message" cols="25" id="ContactForm1_contact-form-email-message" name="email-message" rows="5"></textarea><br />
<br />
<input class="contact-form-button contact-form-button-submit" id="ContactForm1_contact-form-submit" type="button" value="Send" /><p style="display: inline-block;">Powered By<a href="http://joe-amis.blogspot.com"><img src="https://blogger.googleusercontent.com/img/b/R29vZ2xl/AVvXsEjdWgvbcdCCvk2ixC7WL_SDmT90Qcv-aGazppQNCc1WsCt1gZ583adR7SzDWrnDY6JehyphenhyphensfWKD_L9bcNtPD7VVFTOT0DwmI0H-NMkwh65a-MX70x6YKpGHUpnn_uFg7mL8blVBpNi7DBTZb/s1600/logo+copy.png" width="59" height="29" /></a></p>
<div style="max-width: 222px; text-align: center; width: 100%;">
<div class="contact-form-error-message" id="ContactForm1_contact-form-error-message">
</div>
<div class="contact-form-success-message" id="ContactForm1_contact-form-success-message">
</div>
</div>
</form>
</div>
Next step is to register this.
 For that Go to Blogger->Template->Edit HTML
Paste this code before </html> Tag.

<script>
_WidgetManager._RegisterWidget('_ContactFormView', new _WidgetInfo('ContactForm1', 'lowerbar2', null, document.getElementById('ContactForm1'), {'contactFormMessageSendingMsg': 'Sending...', 'contactFormMessageSentMsg': 'Your message has been sent.', 'contactFormMessageNotSentMsg': 'Message could not be sent. Please try again later.', 'contactFormInvalidEmailMsg': 'A valid email address is required.', 'contactFormEmptyMessageMsg': 'Message field cannot be empty.', 'title': 'Contact Form', 'blogId': 'YOUR BLOG ID', 'contactFormNameMsg': 'Name', 'contactFormEmailMsg': 'Email', 'contactFormMessageMsg': 'Message', 'contactFormSendMsg': 'Send', 'submitUrl': 'http://www.blogger.com/contact-form.do'}, 'displayModeFull'));
</script>
Replace your blog id With the Black Coloured Text.
I'll be creating a new post on checking your blog id.
And Enjoy.
Continue Reading

The First Post.

About Me
My name is Jovel Sam. I'm a 7th standard student of Bethany St.John's E.H.S.S, I'm a programmer, But really not an expert. I know some programming languages, from that I made a social site(still its in my PC). I'm gonna publish it in this month or late. I can answer almost all problems related to Android, Windows, HTML, PHP problems or FAQs. Visit my Blog for becoming a Junior programmer.
Continue Reading